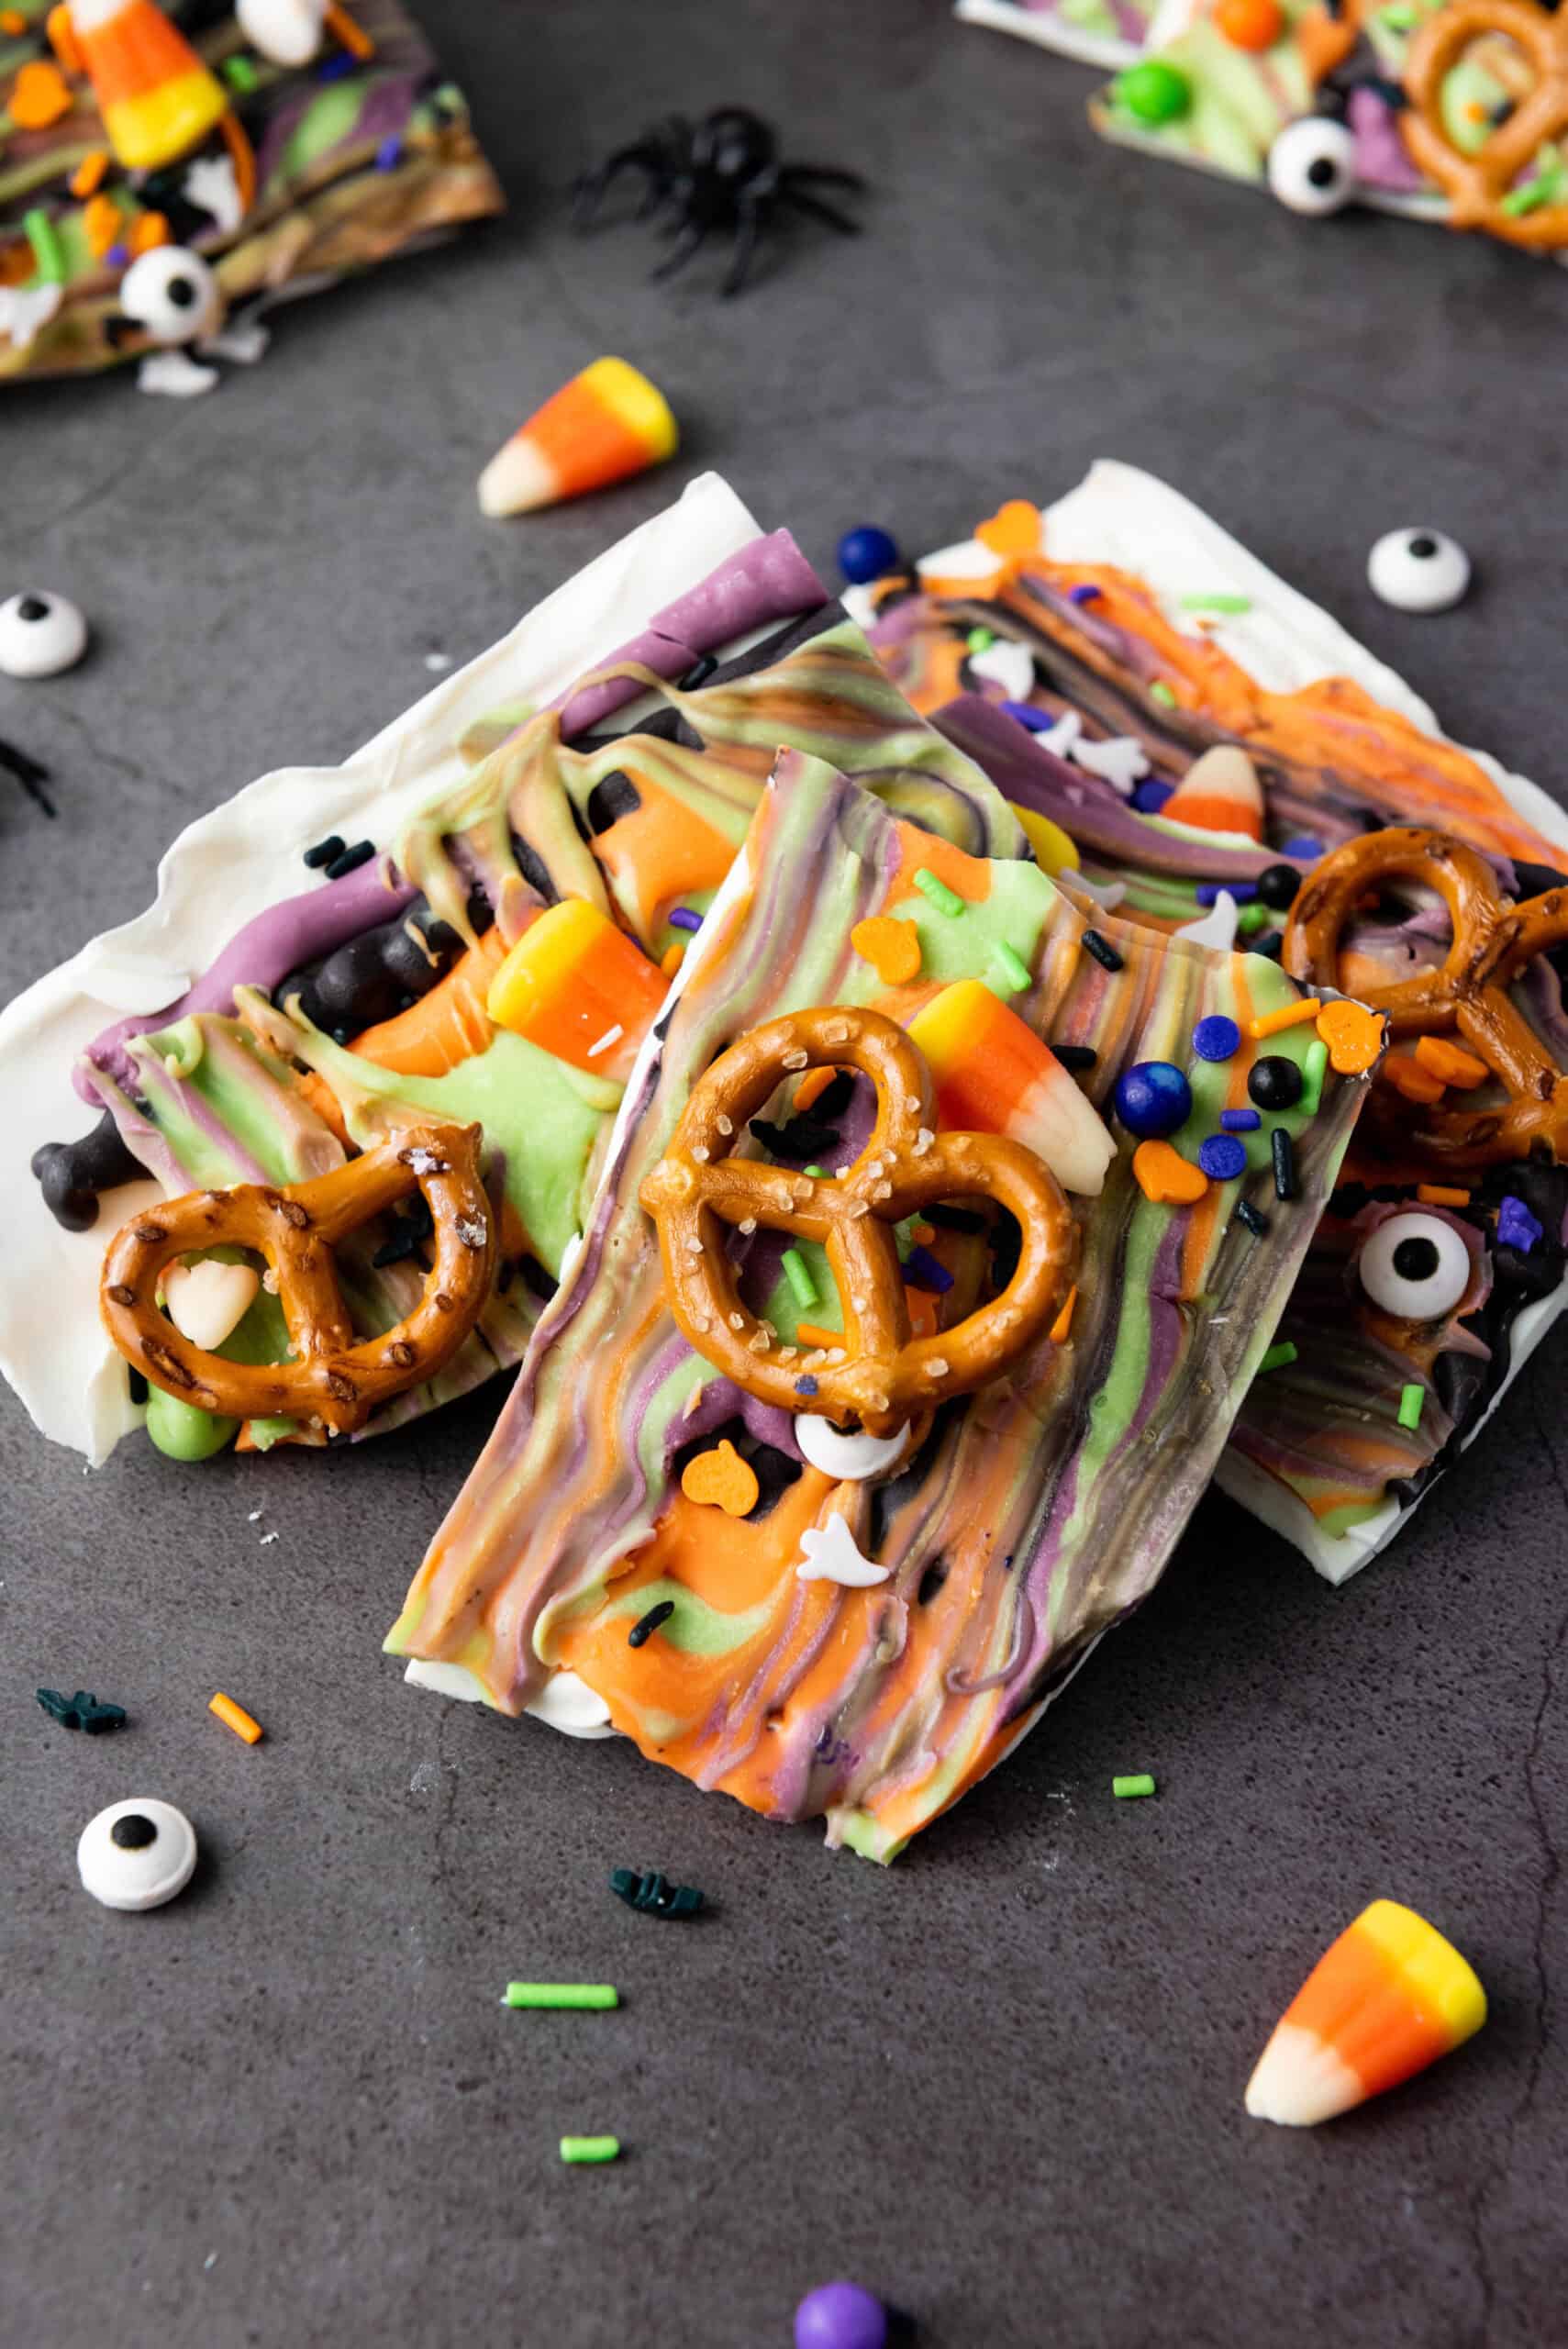
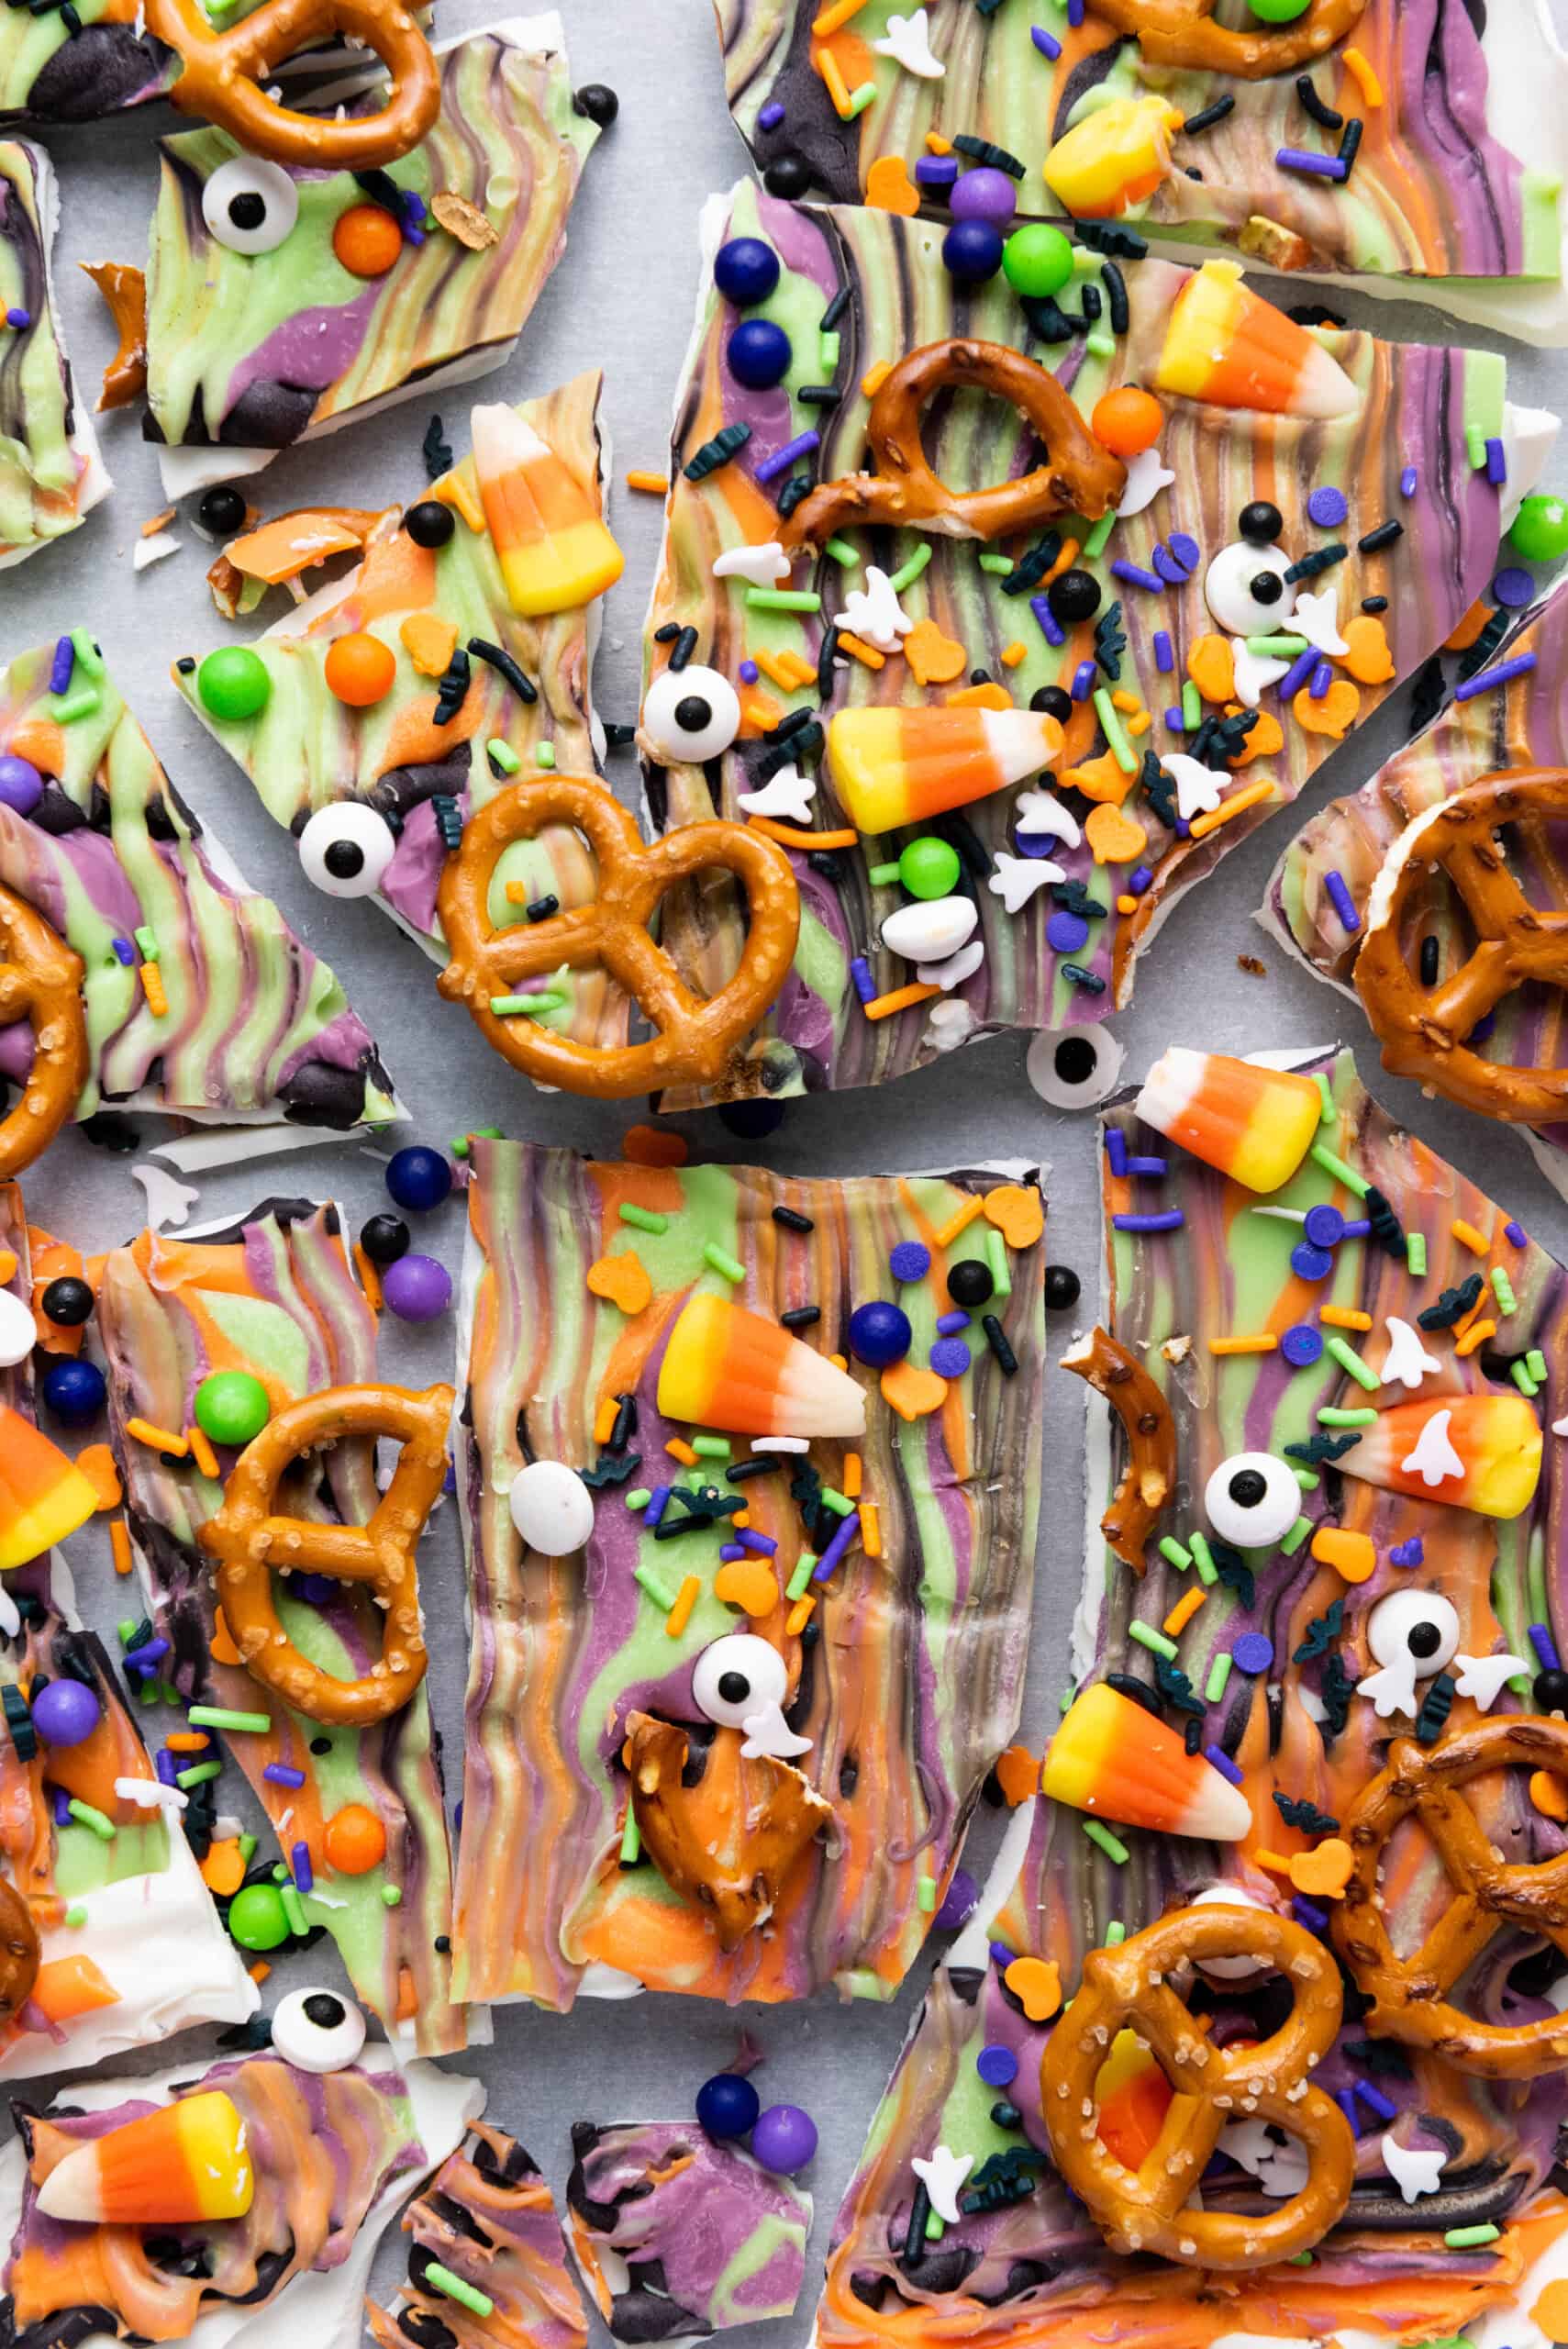
I make this Halloween Candy Bark every October because it's the easiest way to use leftover candy while still looking like I spent hours making it. It's colorful, cute, and so Insta-worthy for any Halloween party.
Holiday treats are my fave. The easier and cuter, the better. I've been obsessed with candy bark since college because it feels like edible art without needing any baking skills.
If you're looking for something quick, colorful, and festive, this candy bark is a total win. It's no-bake, budget-friendly, and a fun way to turn leftover Halloween candy into something aesthetic and giftable.
Things to Know Before Making Halloween Candy Bark
- Melt the candy melts slowly so the texture stays smooth and glossy.
- Use a toothpick to swirl the colors for that marbled, spooky-cute effect.
- Let the bark set at room temp for best texture (fridge can make it too hard).
- Add toppings fast before the candy hardens so everything sticks.
I love that you can make this in under 20 minutes and it always looks impressive. It's the lazy girl's version of Halloween baking.
If you love this Halloween bark, you'll also love our Caramel Apple Bark.
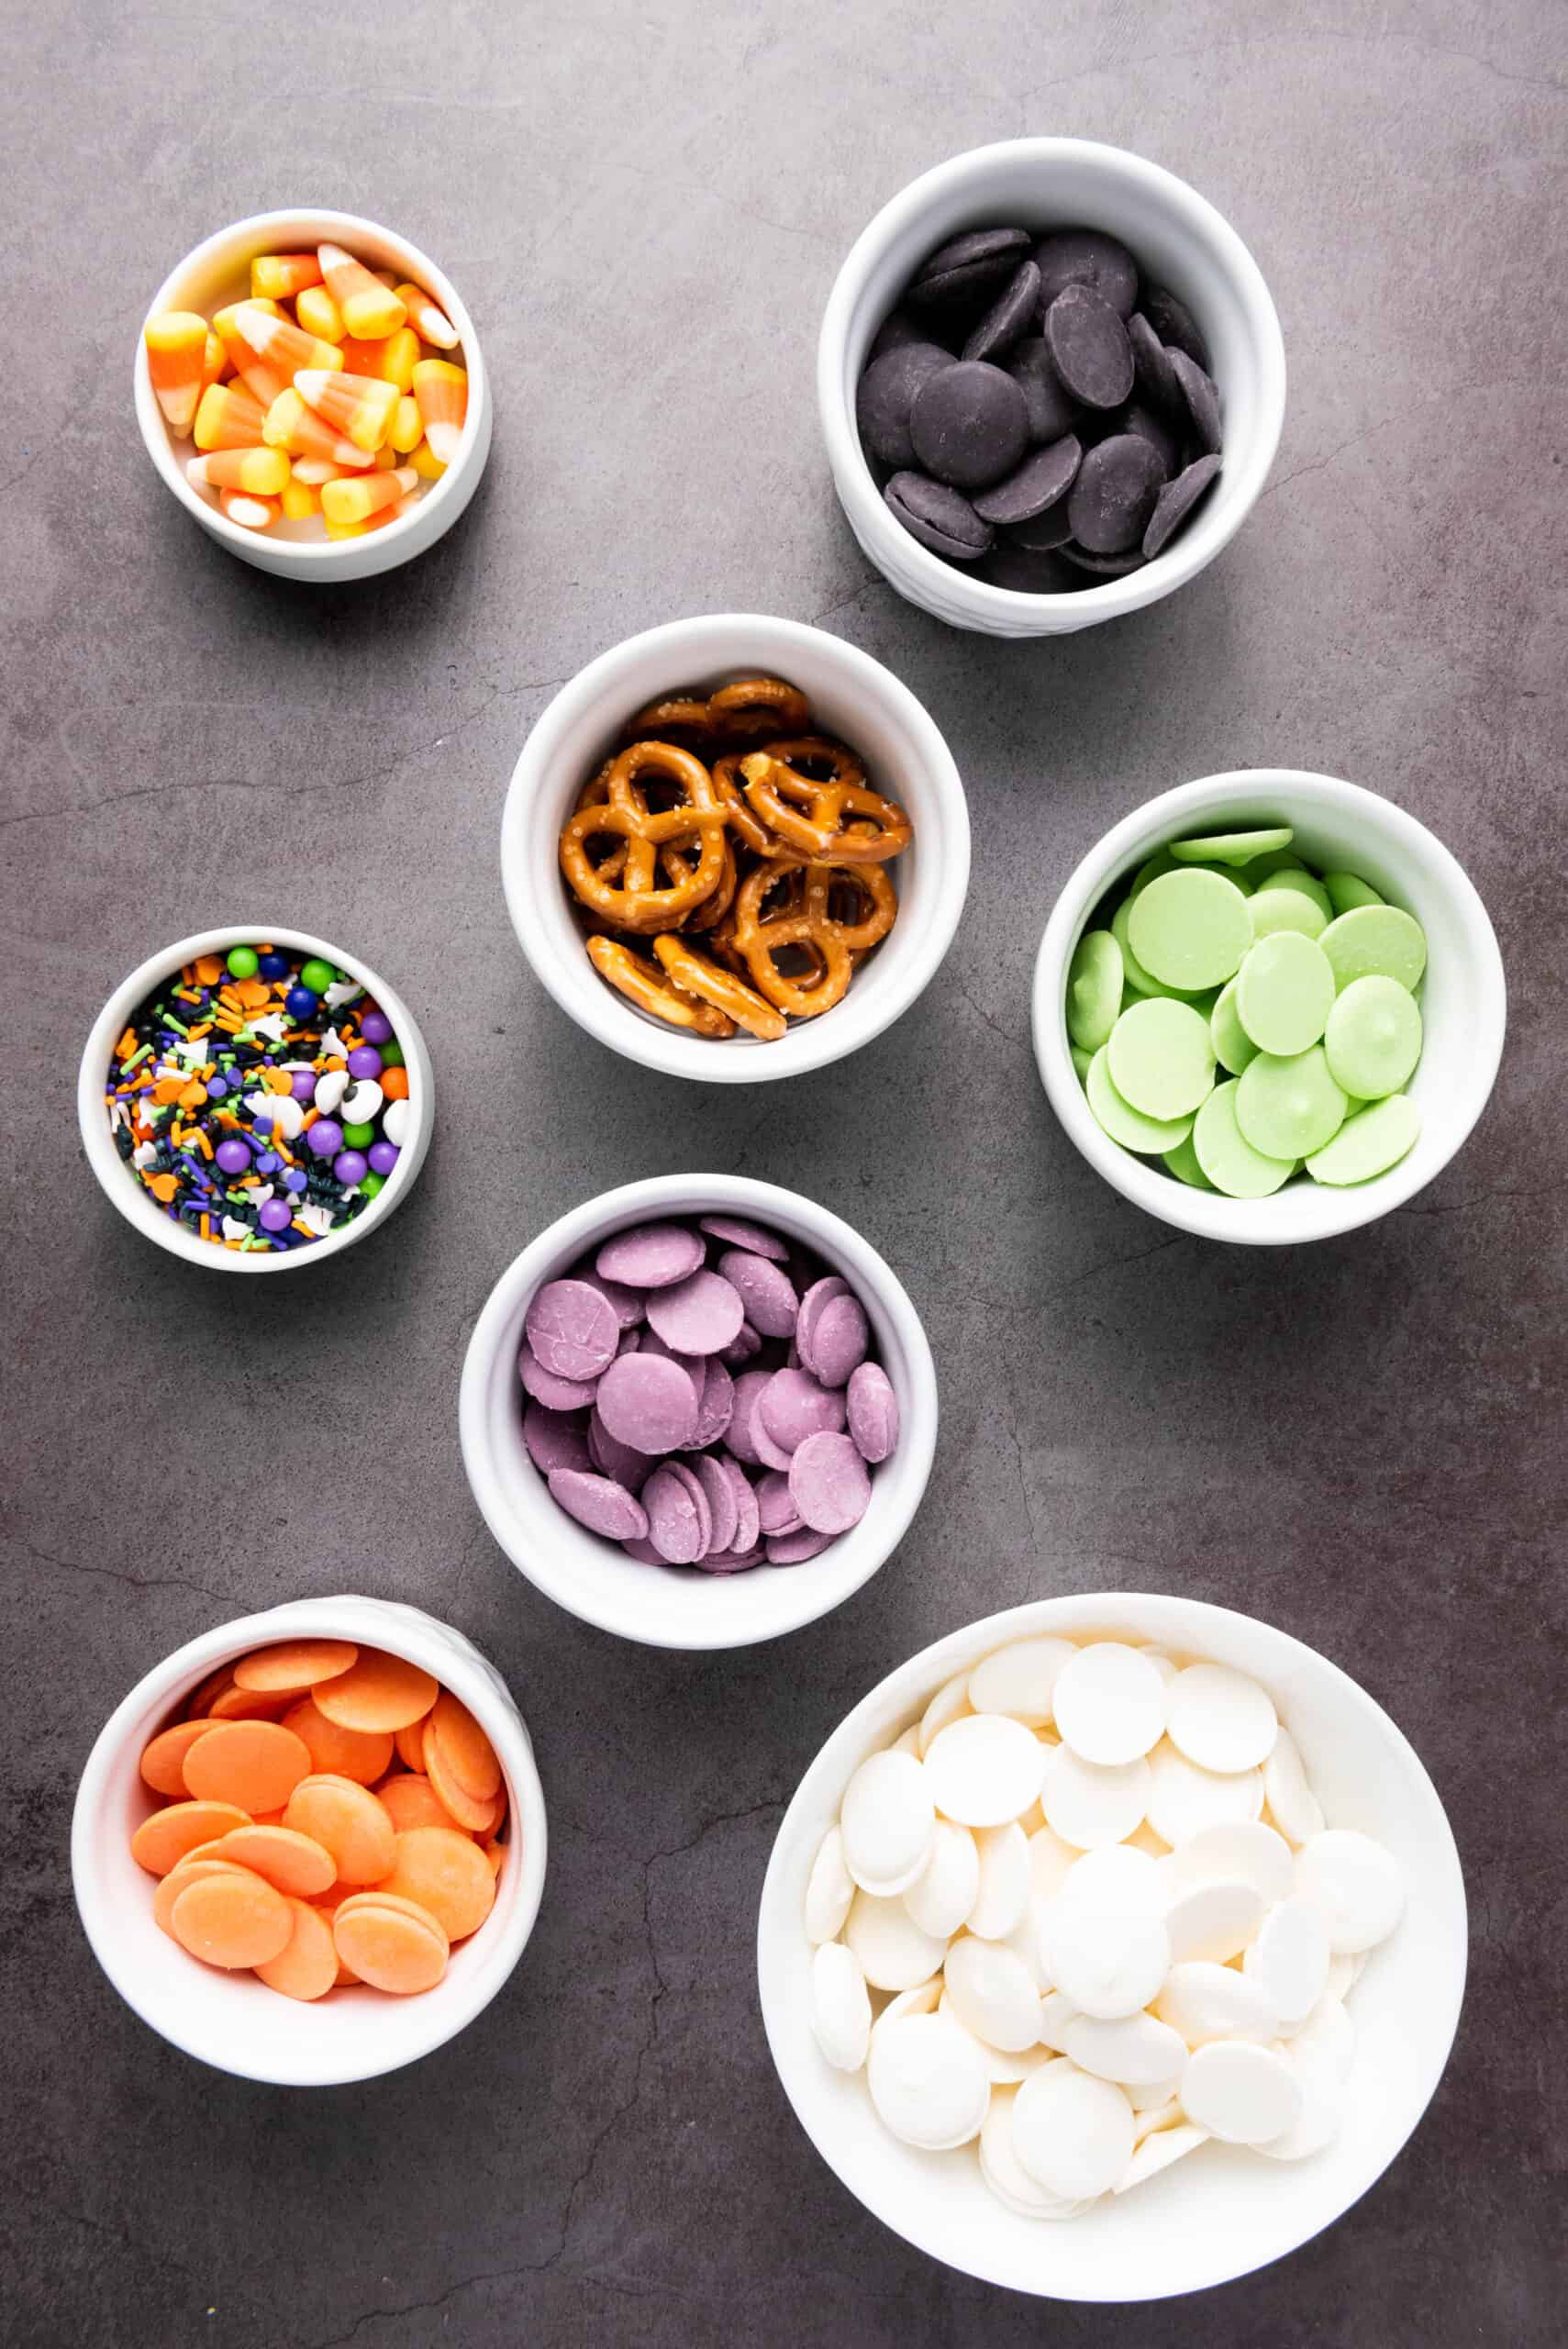
Ingredients You'll Need
Scroll to the recipe card for exact measurements.
- White candy melts: The creamy base that holds everything together.
- Colored candy melts (orange, purple, green, black): Adds spooky swirls and color contrast.
- Candy corns: The ultimate Halloween touch of sweetness and texture.
- Mini pretzels: Adds crunch and that sweet-salty combo.
- Halloween sprinkles: For sparkle, fun, and extra color.
Tools: A baking sheet, parchment paper, spatula, and a few small bowls for melting colors.
How to Make Halloween Candy Bark
Step 1: Line a baking sheet with parchment paper or a silicone mat so the bark releases easily once it sets.
Step 2: Microwave the white candy melts in 30-second bursts, stirring in between until smooth and creamy.
Step 3: Pour and spread the melted white candy onto the lined baking sheet into an even layer about ¼ inch thick.
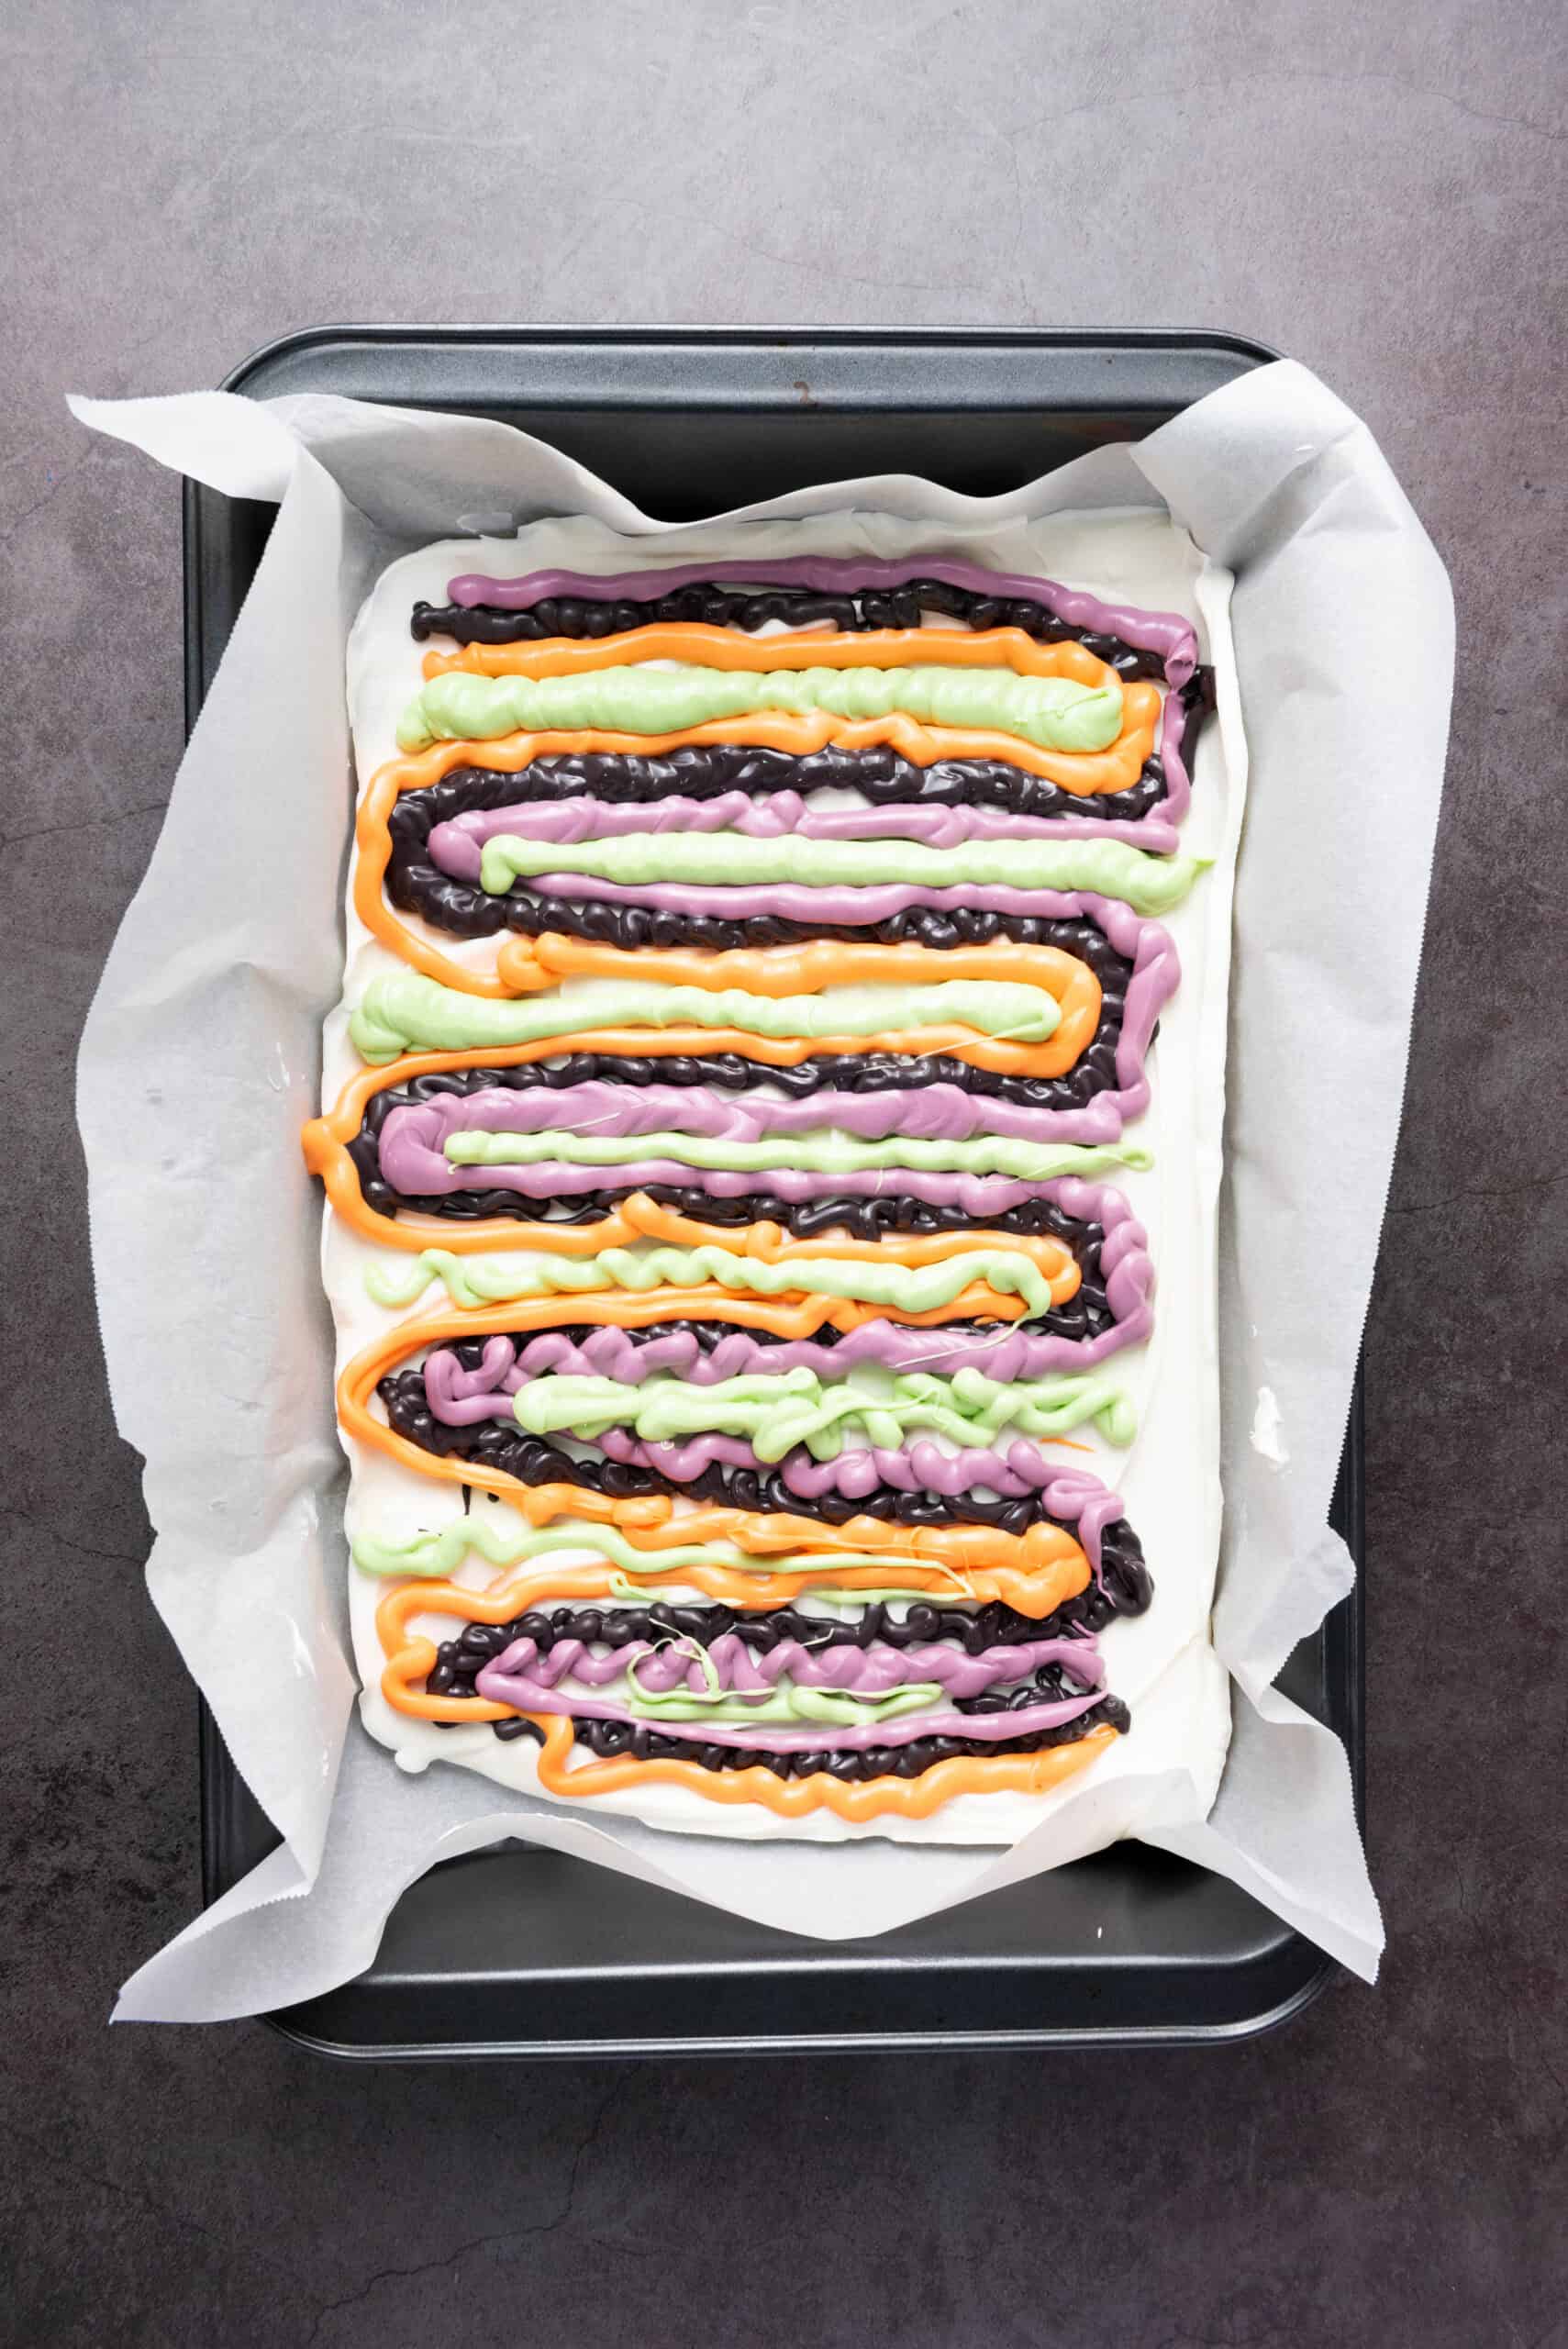
Step 4: In separate bowls, melt the orange, purple, green, and black candy melts. Work quickly so they stay pourable.
Step 5: Drop spoonfuls of the colored melts over the white base. Swirl gently with a toothpick or skewer for that marbled, Halloween vibe.
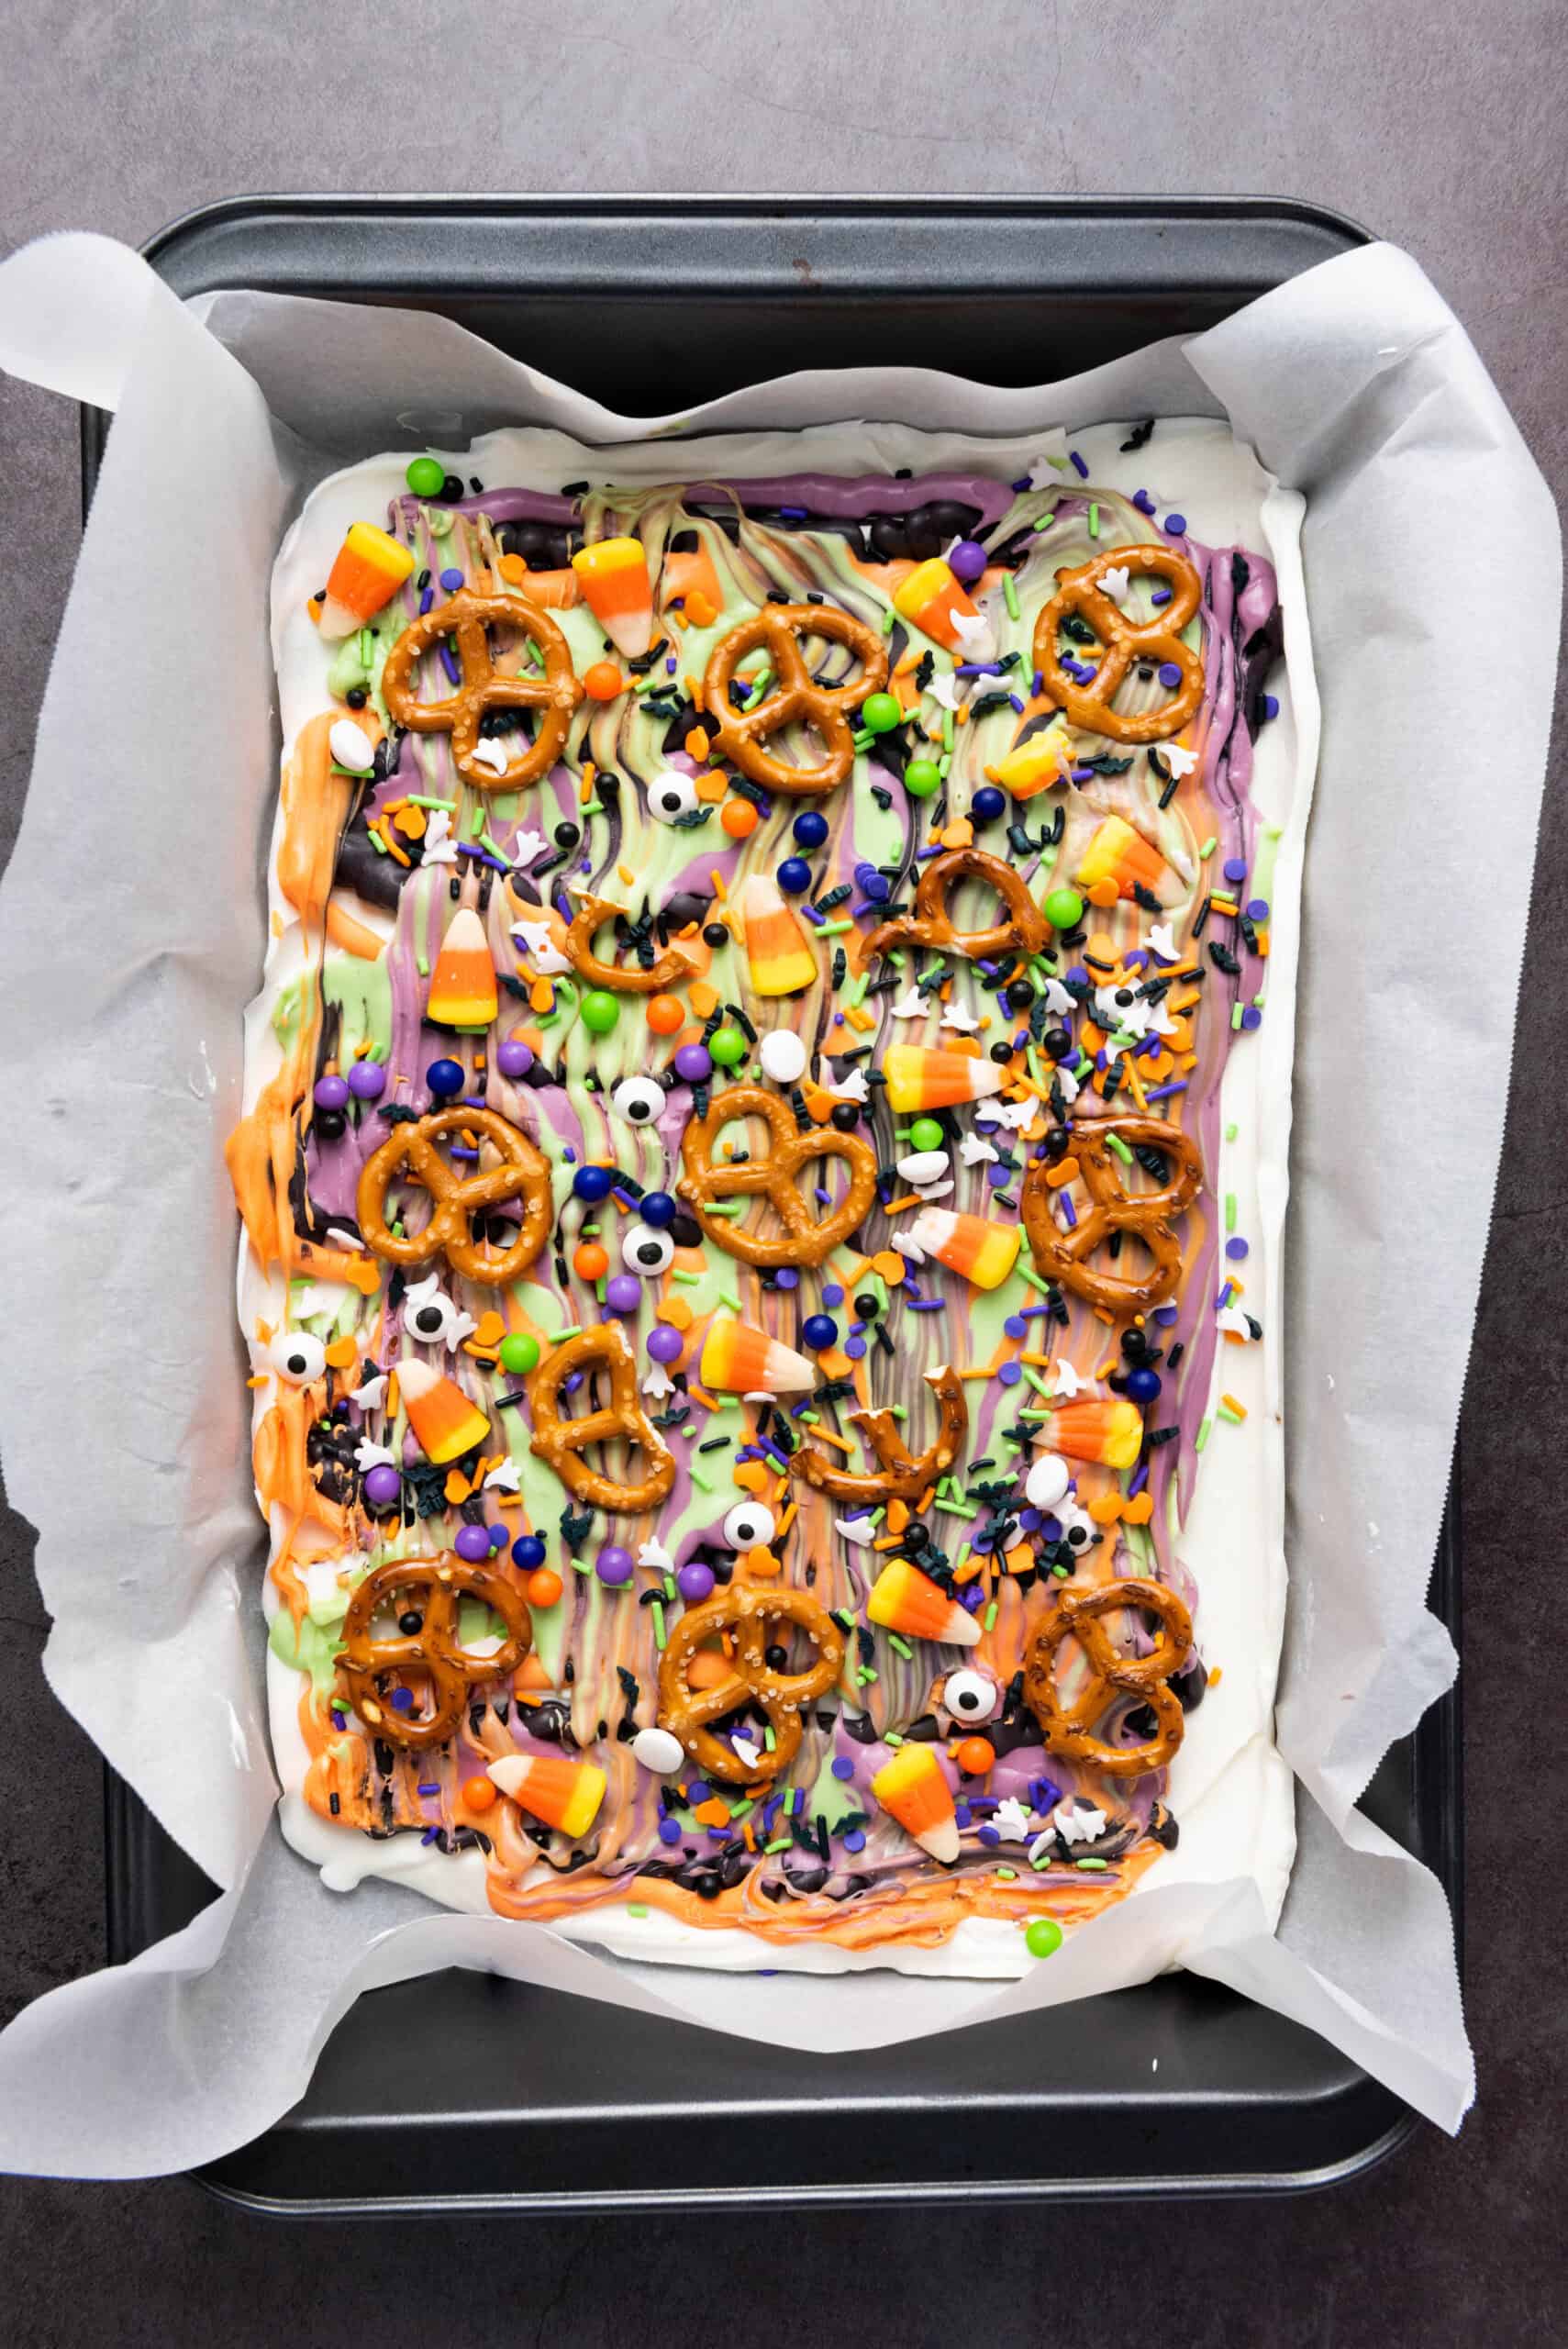
Step 6: Sprinkle candy corns, pretzels, and Halloween sprinkles right away. Press lightly so they stick before the candy sets.
Step 7: Leave at room temperature for 1-2 hours, or pop it in the fridge for about 30 minutes if you're impatient like me.
Step 8: Once firm, break the bark into random pieces. Store in an airtight container and enjoy your cute creation!
Substitutions and Variations
- Use milk or dark chocolate as the base for a richer flavor.
- Add crushed Oreos or gummy worms for extra texture.
- Try a pastel version for spring or Valentine's Day.
- Mix in popcorn or cereal for a snack-style twist.
What to Serve with Halloween Candy Bark
Pair it with hot cocoa, a pumpkin cream cold brew, or a spooky snack board for a cozy movie night or Halloween party spread. It's also perfect for gifting in little treat bags.
Storage and Freezing
Store leftovers in an airtight container at room temperature for up to 1 week. If it's warm out, keep it in the fridge so the candy doesn't melt. Avoid freezing as it can mess up the texture and colors.
FAQs
How long does Halloween candy bark last?
It lasts about a week at room temperature or up to two weeks in the fridge.
Can I use chocolate chips instead of candy melts?
Yes, just melt them slowly and add a teaspoon of coconut oil for smoother consistency.
Why did my bark crack unevenly?
That's normal! The uneven cracks actually make it look more rustic and fun.
Can I make this ahead of time?
Absolutely. Make it a few days early and store it in an airtight container until your party.
More Easy Halloween Recipes
- 25 Easy Halloween Treats
- 31 Easy Halloween Party Snacks for Adults
- Chocolate Pumpkin Patch Brownie Cake
- Air Fryer Halloween Mummy Dogs

Easy Halloween Candy Bark
This Halloween Candy Bark is a fun and colorful no-bake treat made with candy melts, pretzels, candy corn, and sprinkles. Perfect for parties, gifting, or using up leftover Halloween candy!
Ingredients
- 12 ounces white candy melts
- ¼ cup orange candy melts
- ¼ cup purple candy melts
- ¼ cup green candy melts
- ¼ cup black candy melts
- ½ cup candy corns
- ½ cup mini pretzels broken into pieces
- Halloween-themed sprinkles
Instructions
-
Line a baking sheet with parchment paper or a silicone mat so the bark releases easily once it sets.
-
In a microwave-safe bowl, melt the white candy melts in 30-second intervals, stirring until smooth.
-
Pour the melted white candy onto the baking sheet and spread into an even ¼-inch layer.
-
In separate bowls, melt the orange, purple, green, and black candy melts.
-
Drop spoonfuls of the colored melts onto the white layer and swirl with a toothpick creating a marbled effect.
-
Top with candy corns, broken pretzels, and sprinkles, pressing lightly so they stick.
-
Let set for 1-2 hours at room temperature (or 30 minutes in the fridge).
-
Once firm, break into pieces and store in an airtight container.
Recipe Notes
- Line your baking sheet for easy cleanup
- Melt colors one at a time to avoid clumping
- Swirl gently for best marble effect
- Work quickly once melted so colors don't harden before swirling.
- Great for parties or gifting in treat bags


Leave a Reply